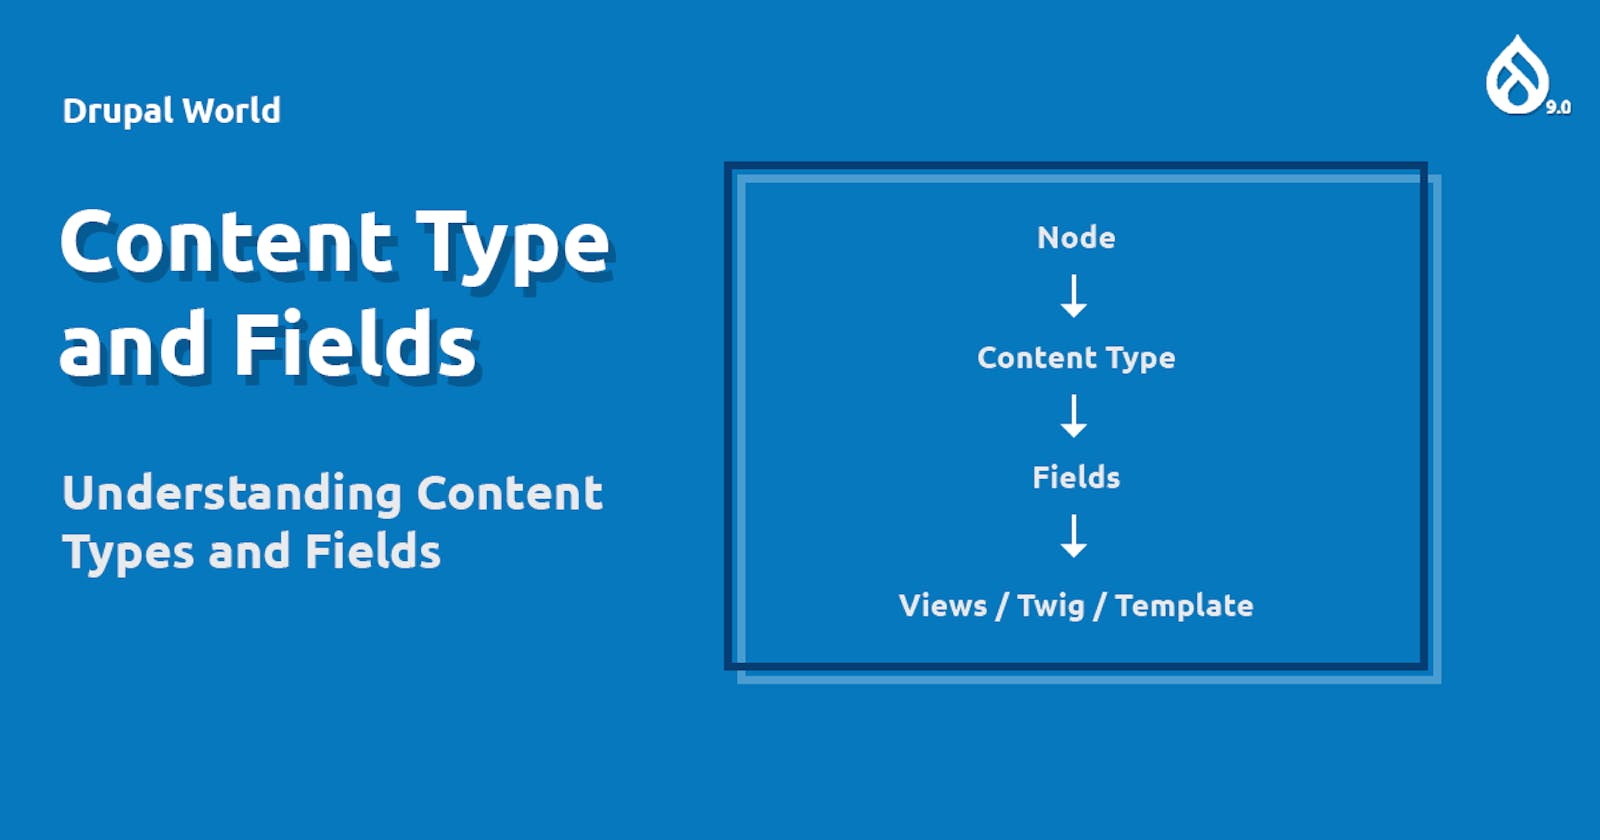


Content Type and Fields is what makes Drupal so powerful CMS. Imagine you have webpage that displays latest news and posts, we create content type for each of them. Content type "News" will have fields that we can add using drupal backend interface and in no time, we will have the site ready to start publishing news. For our learning purpose let's create a news content type.
First, let's note how our content will be named and what data will it store.
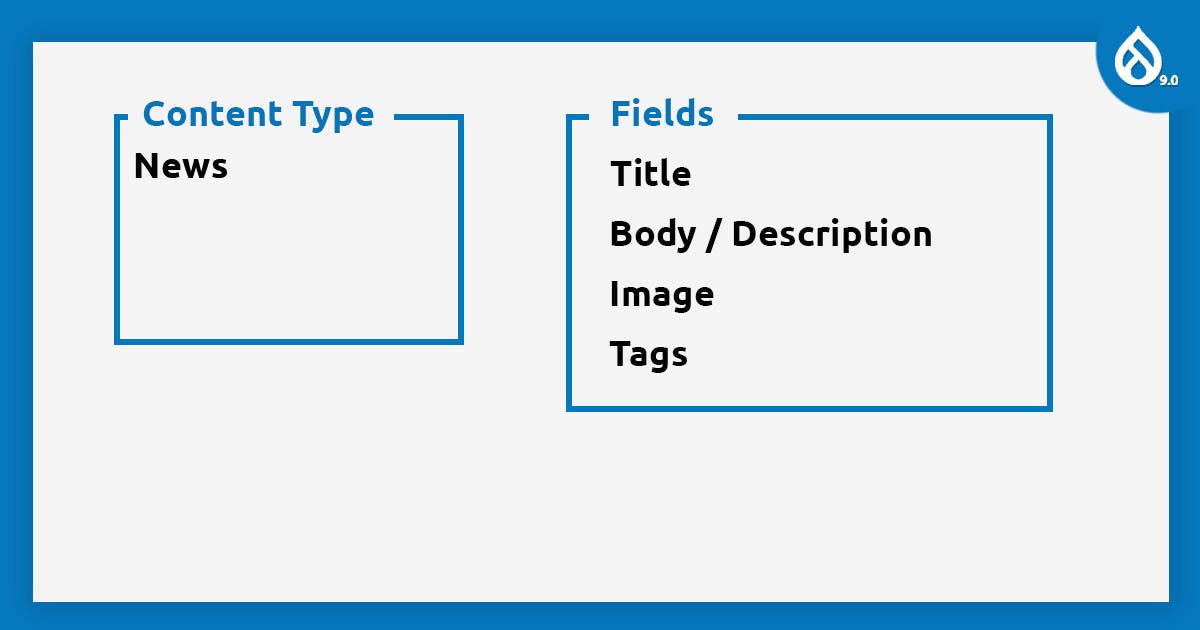
We will call our content type "News" and will have four fields, such as Title, Body (Description), Image and Tags. The Title will be a text input, body will be in text area, image will be able to upload an image file and tags will be a reference field pointing to tags (called taxonomy in Drupal). Let's get started.
Creating New Content Type
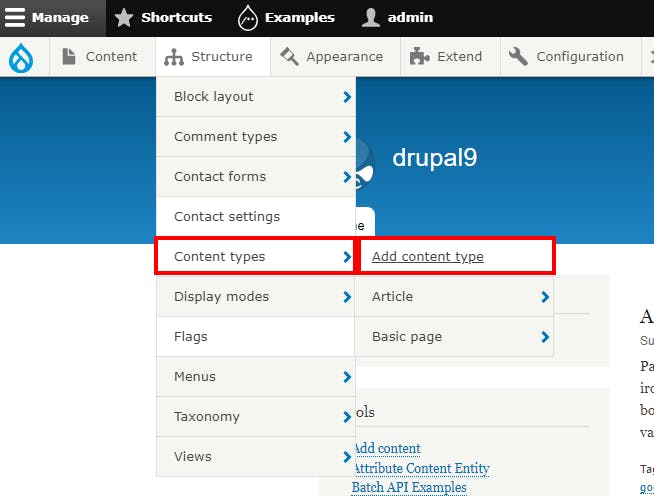
Now, let's go to the content type creation page. Navigate to "admin/structure/types/add" directly or using our admin toolbar module, hovering to "Structure > Content types > Add content type".
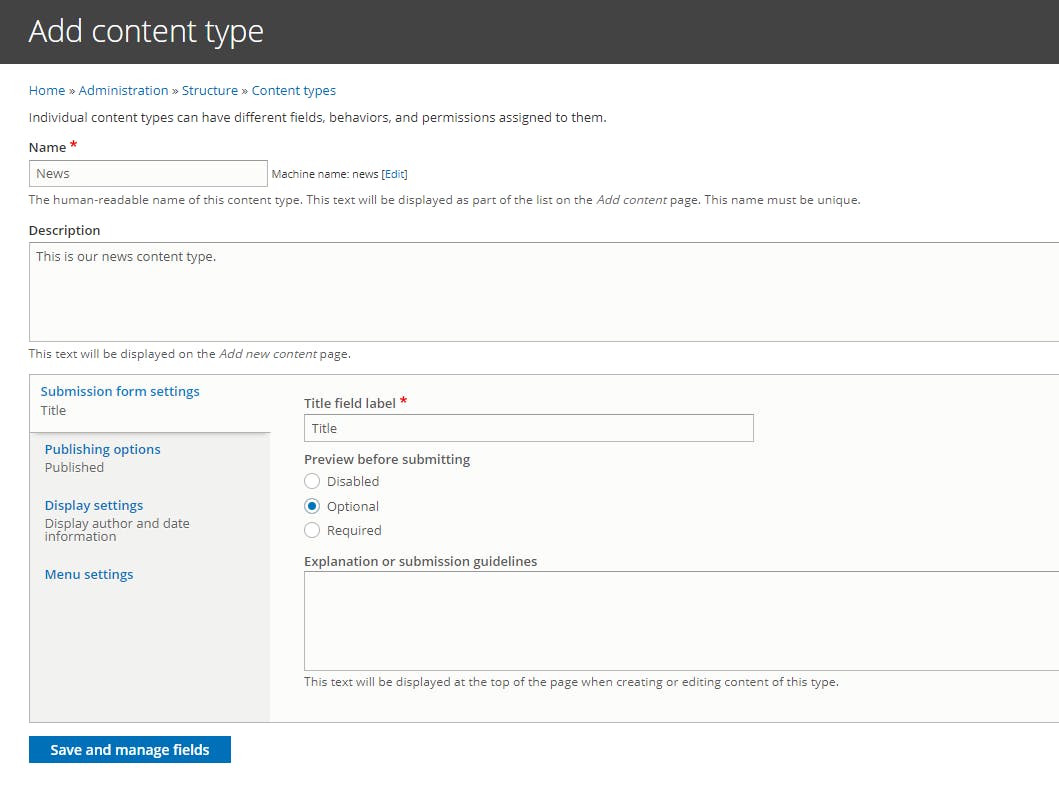
There are some options to consider while creating a content type. We can rename it's title to whatever we want for example "Name" or "Label". Under Publishing Options, we can choose to make our news content published by default or make content writer to publish them later on. Also, we can opt-in for creating new revision of the content every time this content will be updated.
That's it, now save it and it will redirect us to manage fields page or you can manually go to this page "/"
The Manage Fields page is quite special. Here we can add as many fields as we want with lot of choices for field type. Be careful on what your requirement is because once you start entering data into it, the field type can not be changed. Also note that we can either create a completely new field or reuse similar field that was already created in other content types. When creating a new field, drupal automatically create two tables in database, one for the field value other for the field revision. So, when we start creating fields, it will be best to reuse fields that have similar values and storage requirements.
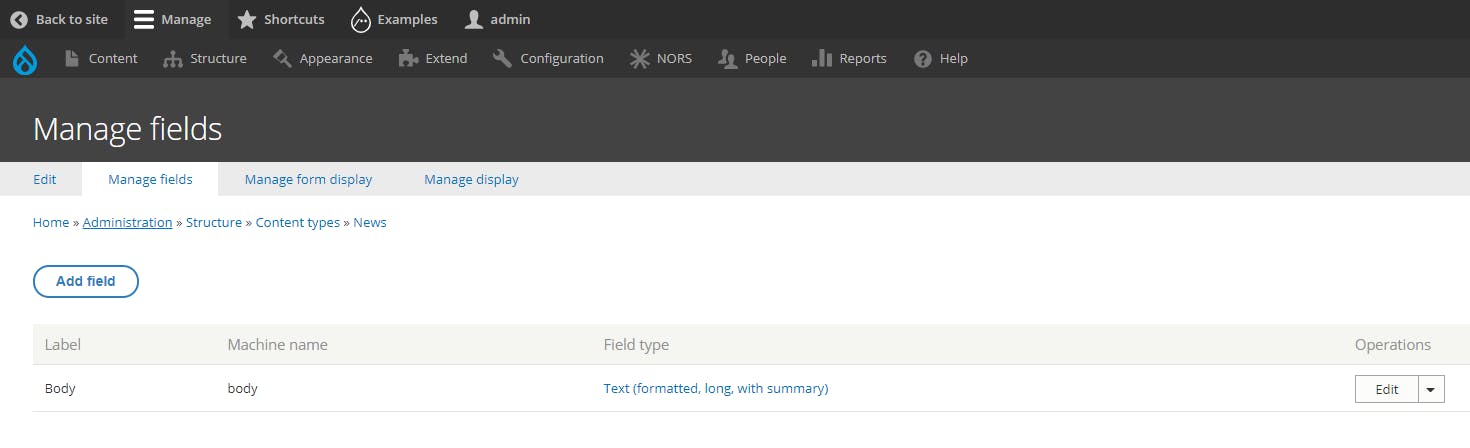
This page also leads to two new pages. First is Manage form display and the other is Manage display.
The Mange form display page helps us to sort our fields based on which the form will show them in the create/edit form of this content type. If we want the image field to show up in the top after the title field, we have to drag and drop the field below title and save the settings.
We can see that Body field is already there. Drupal does this automatically and every content will have body field. But we do have option to delete them if we do not need them. For now, let's keep it as it is as we do want "Body" field in our content type.
Let's create new field "Image" by clicking on the "Add field" button. In the next page, we can select the option to create a new field or reuse an old field. Here we choose a new field and it's type. We choose "Image" under "Reference" and type "Image" for the label. We can also notice that the machine name was updated automatically (sometimes it's slow to react to our typing). The machine name is how drupal saves our new field. Let's save it.
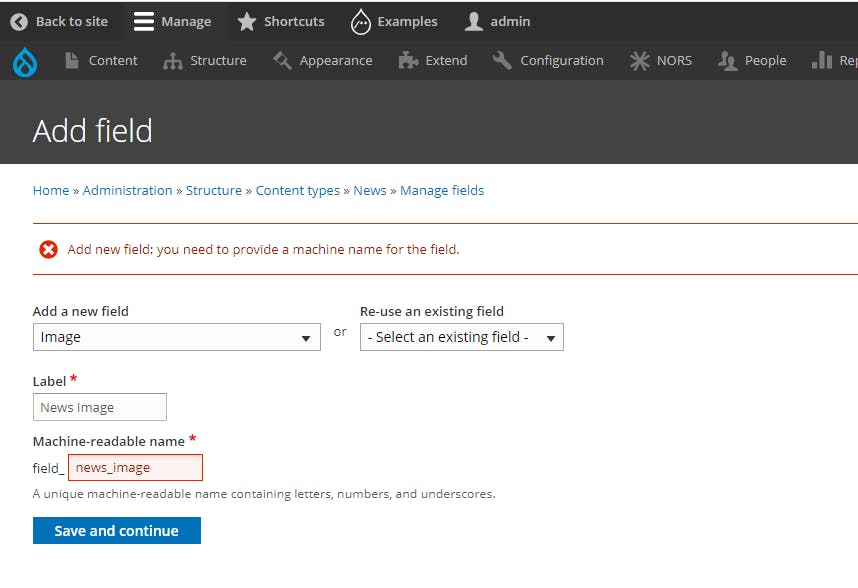
[ note : sometimes the field name can already exists, in that case manually rename the machine name and submit ]
In the next page, the important and most useful part is the Cardinality that is how many images we allow user to upload to this field. There is also an option to choose a default field in case user forgets to upload an image at all. After saving the field settings again we are redirected to another form. Here important parts are the upload size limit and whether we want to make our field required. There is also an option to choose a folder for saving our images uploaded to this content type. Let's save it and we are done for the image field.
Similarly, in case of the tags field, we will choose "Reference > Taxonomy term" for field type and name our field as "Category". In next page, we will update our Cardinality to unlimited and click save. Then in the next settings page, what is different is that we will have option to choose which Taxonomy will we refer to.
[ note : Taxonomy is an easy way to organize our content by categorizing them using taxonomy terms. We create a taxonomy vocabulary and add terms to that vocabulary. Later in content type, we can use those terms to categorize the contents. ]
So, we will be choosing "Tags" vocabulary for our purpose.
Now, if we go to the "Manage form display" and "Manage display", we can notice that fields have widgets and formats options respectively. Widgets helps us to choose how the form will render them when creating/editing the content. For example, we can choose "Category" to be as autocomplete field, select list or checkboxes. Formats helps how to render that field when the content is shown. For example, "Image" field can be show as the image directly or we can simply render the url of the image and used it in the twig file differently.
Creating Content "News"
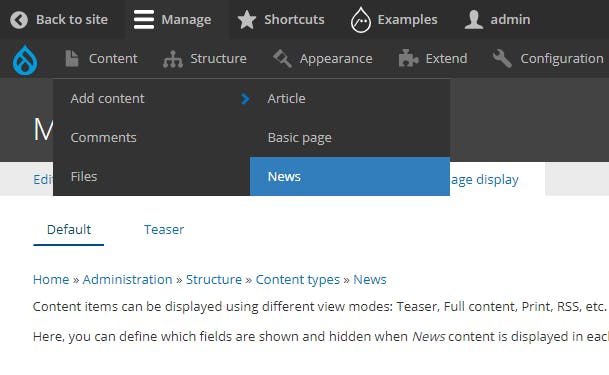
We navigate to "/node/add/news" to create new content of type "News".
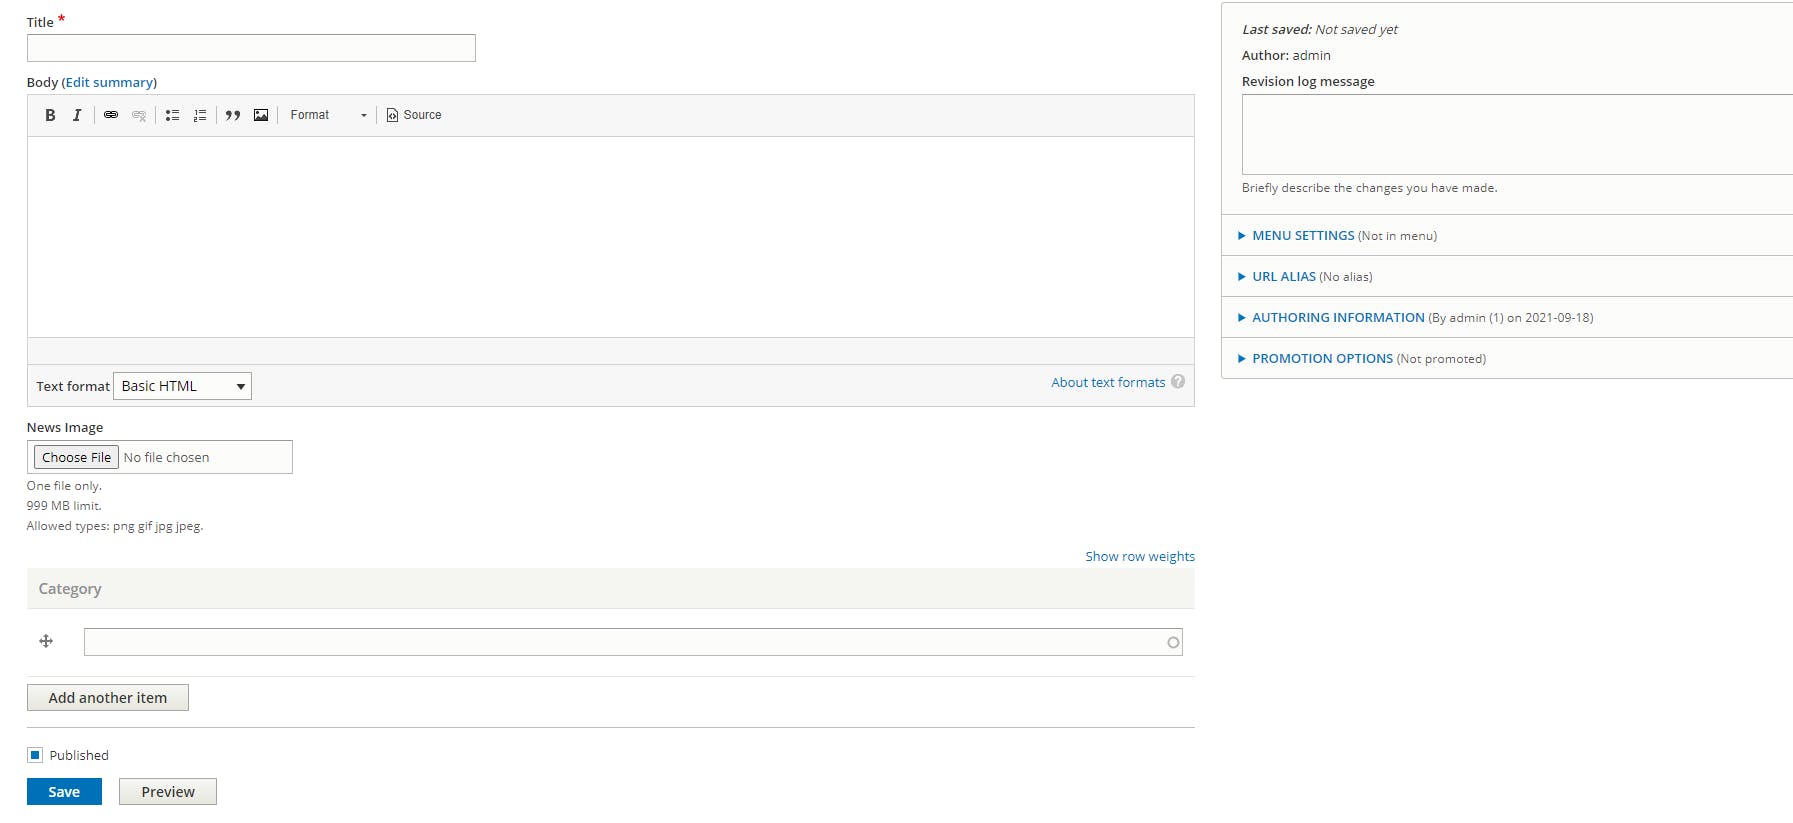
The thing to note here is that, the fields in this form has rendered in exact order we set in the Manage fields and the input types are also same we have set in the widget of the manage fields page.
That's it guys, we have successfully learned how to create content type and add fields to them using drupal backend.
Please leave your comments and your reactions!!!